Mythie - the DVR
It basically started when my set top box died. I can't really complain as it was only a cheap $80 one and I'd had it for at least a year. Anyway I thought about building a digital recorder. There are heaps out on the net based on either windows or Linux and thought how hard can that be (and how cool :)). The first big thing was the case, I mean its going to sit in your living room next to the TV and it has to look like it fits. I surfed and browsed until coming across a suitable looking box. Reasonably tidy looking and cheap. I ordered it in and waited. Well it arrived and I started to put all the bits together. Foxconn Motherboard (Intel 865 chipset), Celeron 2.6 CPU , 512 ram and a 80 gig HDD. I also through in a Fusion HDTV tuner card as well. I also rummaged through my box and found an old ATI tuner card. Analogue but it also has AV input. Great for converting those video tapes of Mountain bike movies.
Now the time to put it all tether. All the fits fitted together as expect and the first problem was encountered. The box runs hot, very hot. The first step was to yank out the dremel tool and cut out all the fan covers and also fit some more fans in an attempt to get some more air flowing through the case. The results were satisfactory and I proceeded to install MythTV. Needless to say this was a steep learning curve with numerous obstacles such as trying to get drivers for the tuner card, USB remote and basically not knowing what the hell I am doing. This learning curve involved many months sitting on the shelf, weeks and late nights scratching my head and asking Dr Google for advise. At long last success reared its so so beautiful head. At this stage I had become totally dissatisfied with the GTR box and had been investigating some other options for a suitable box.
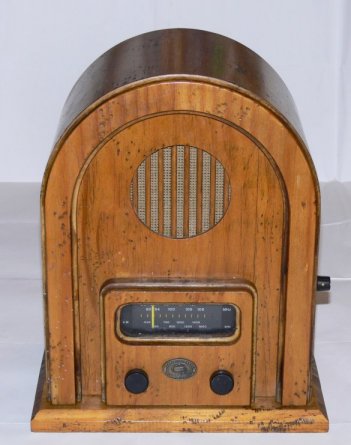
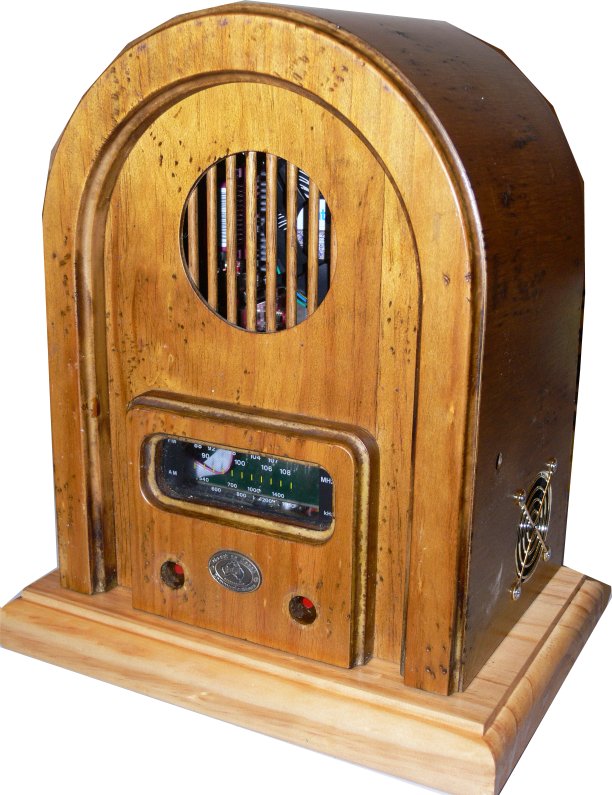
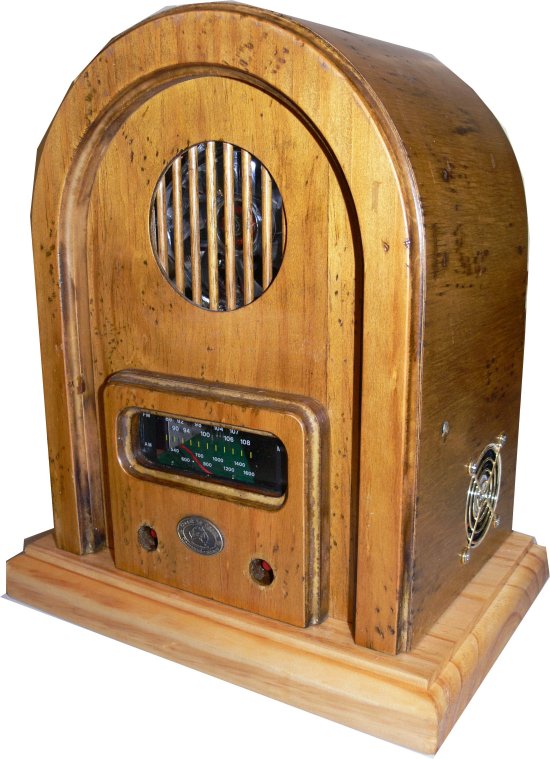
With ideas fuelled from Atomic Magazine I knew that my only reasonable concern was 1: it had to look okay next to the TV and 2: its had to be large enough to fit a PC inside. After many weeks looking, hunting and bouncing ideas around I decided on using an old wooden valve radio. Now I had to find one. Searching on eBay I quickly noticed my first major flay. Some of these radios are going for over $900 and even the cheap ones were reaching $200+ prices. That was until I found this on eBay. Ripper. Price was low and my only factor to okay was its size. I quick email returned the dimensions of 315 x 255 x 185 which is more than enough room to work with. I bid away and 4 days latter this was mine.
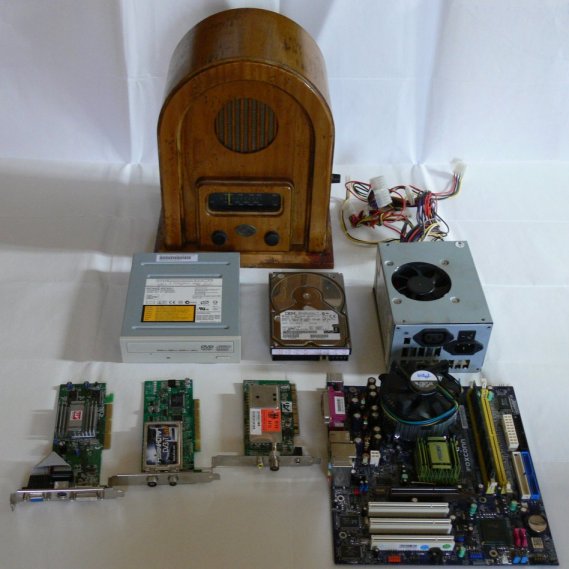
Now all I need to do was fit these parts into the box which as you can see is going to be very tight.
I then noticed that the MB looked quite big, horror crept up on me as I looked at the base I realized that the dimensions provided were exterior and not what I could work with. I re-measured the radio (excluding the BASE) and found that what I had to work with was only 250 x 225 x 135. Doh. A quick search on eBay uncovered a motherboard that would fit inside here
The Assembly.
In order for me to have any hope in hell of these bits fitting all together I needed to downscale on a few items. Mainly the motherboard, powersupply, cd-rom drive and hdd.
The component list know reads like this
2.8 Celeron CPU
MSI PM8M2 Motherboard (Ebay $45)
512 Meg ram
20gig Laptop HDD ,2.5"
Laptop DVD drive with USB adapter (Ebay $9.95)
Mini powersupply
At this stage I installed Fedora as a test run. All runs sweet.
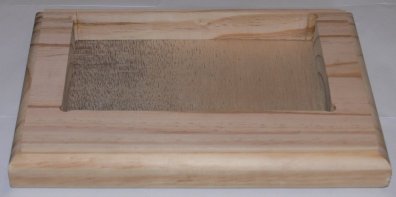
But still I needed to create some more room. A sneaky first step was to create a new base with an artificial bottom. This gave me an extra 30mm which was all I needed
but required some creative engineering to create some more room. A new base for the radio added another 30mm of height
This combined with some extensive case mods gave me this...
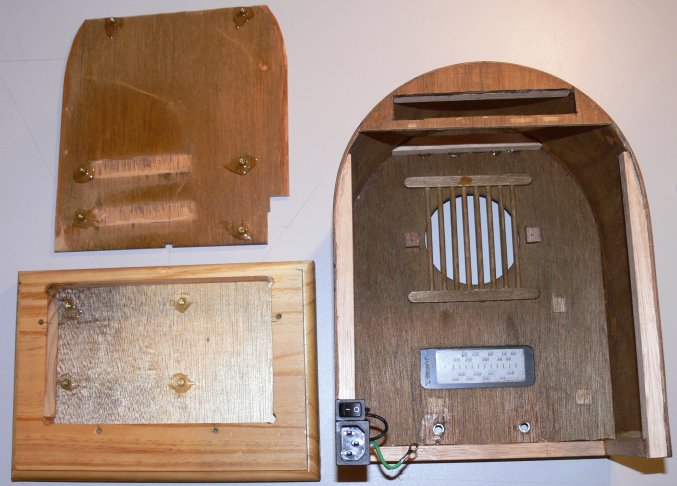
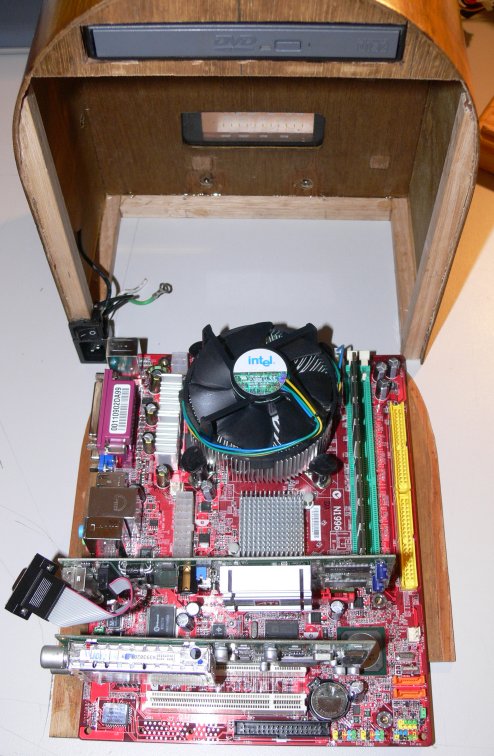
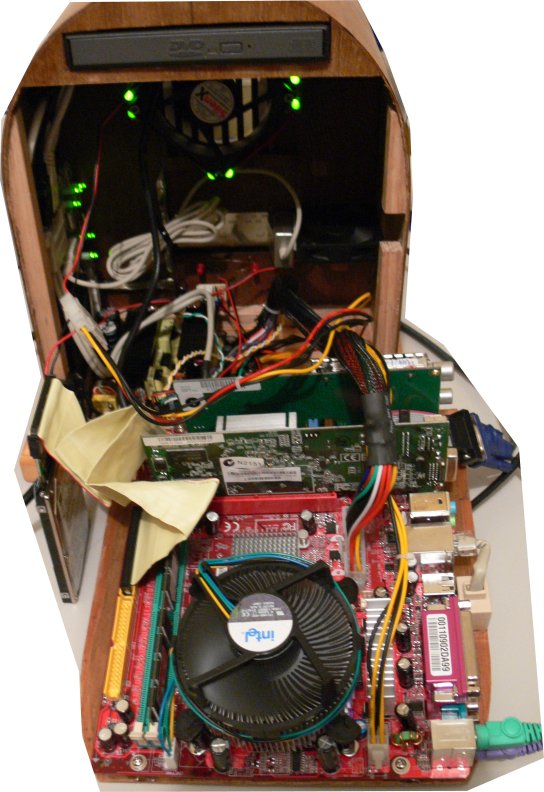
and with all the components mounted
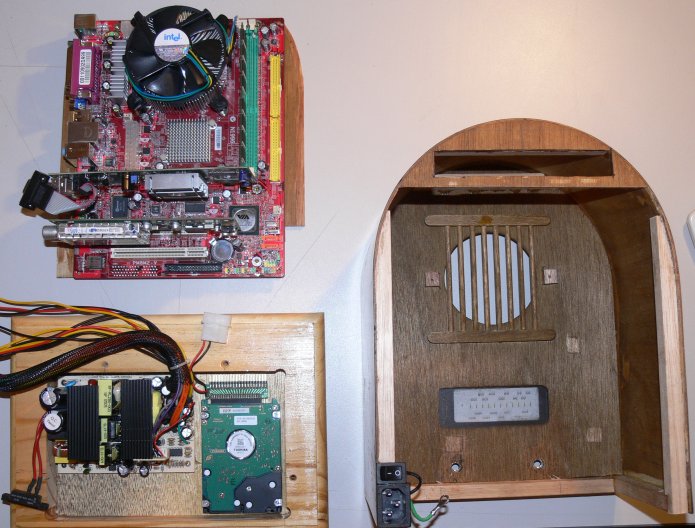
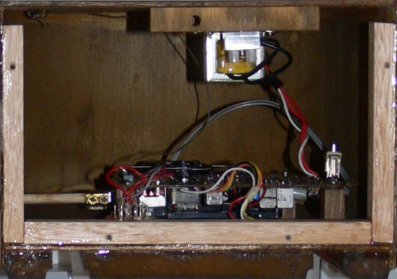
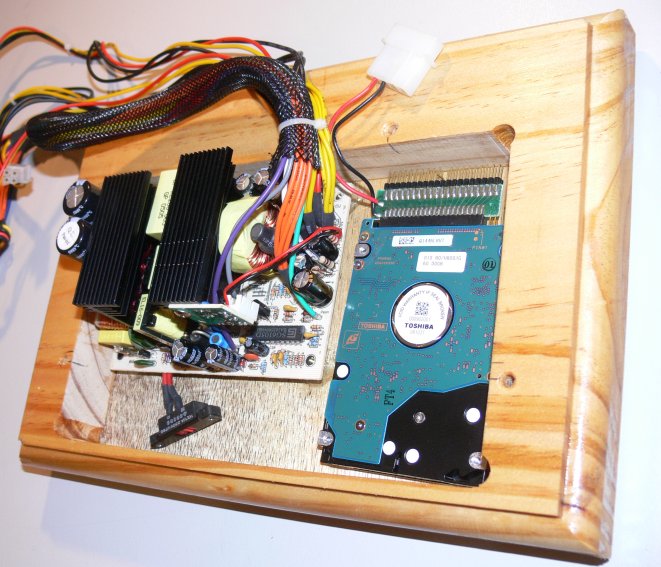
Zooming in on the base
and lining up the motherboard, note DVD drive. Still needs some modding yet
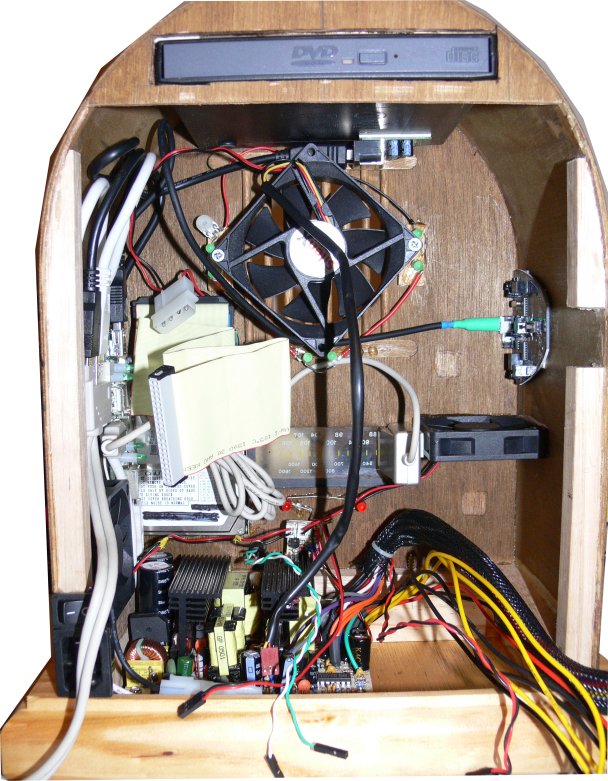
And yes it does all fit. Some thick plastic as insulation and a few excesses trimmed and should be as safe as a bonfire. Now the electronics. Got to have lots of nice LED's to give the eyrie glow
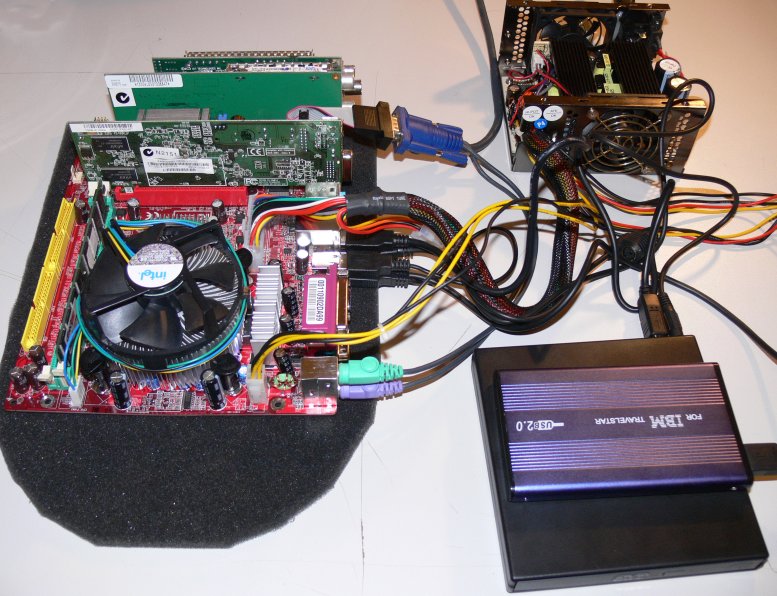
But before then I need to tweak everything so it fits nice and tidy. First is to make sure the motherboard fits nice and tidy and to see what room I have got.
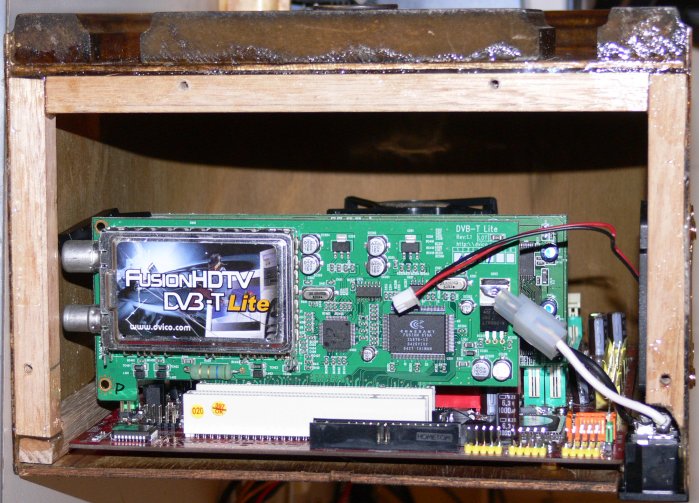
Now a photo from the front showing the CPU (through the grill) and the cooling fan's
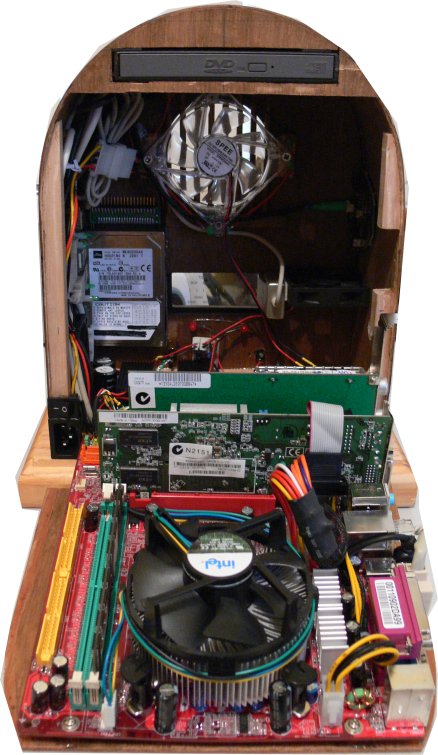
and a picture from the back
Now to fit the Hdd and extra bits.

And with the following added:
USB hub
Motherboard USB connector
2nd fan for controlled airflow
USB remote
Wireless keyboard transmitter
LED's
All necessary cables
and does it boot?
Yippee. Case also closes (nightmare job, Dremmel tool needs to weave some magic) and still operates correctly.
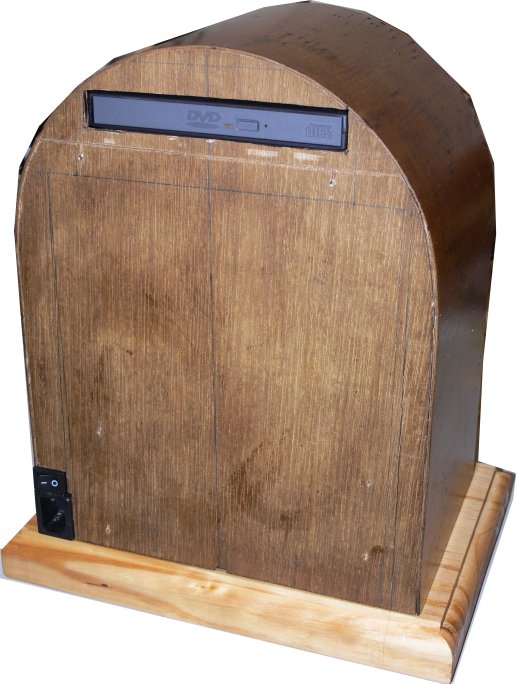
The final result. After some more Dremmel Magic and cable re-routing (heaps tidier)
Now all closed. Note nice brass screws.
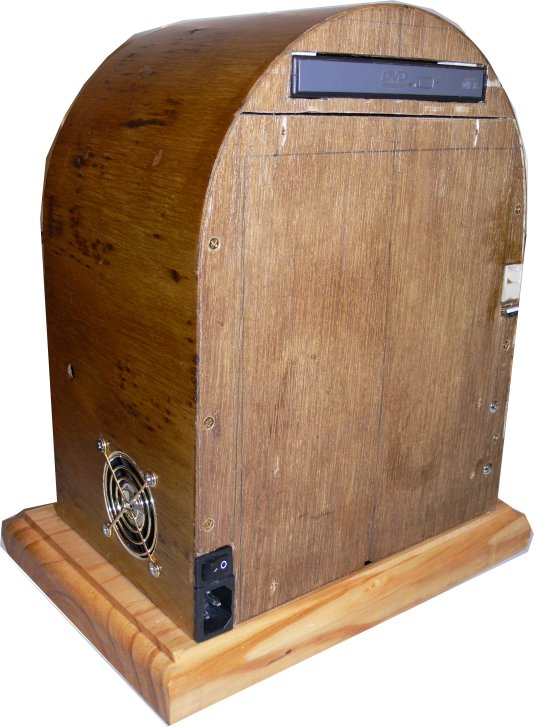
And the front.
And with the buttons fitted, Upgraded the main fan as the LED's just weren't bright enough. You can even see the HDD lights in the tuner window.
